This idea came to me randomly a few weeks ago. I grew up in NY and it was a regular occurrence to see the street vendors selling baggies of mango or mangoes on a stick topped with chili powder. It took me a couple of weeks to figure out exactly how I wanted to incorporate these flavors.

There was a lot of trial and error. As usual, the goal is to flavor and color using natural, preferably fresh, ingredients. There were A LOT of mangoes (I think I used 7 or 8–all scraps and leftovers went into the freezer for smoothies).
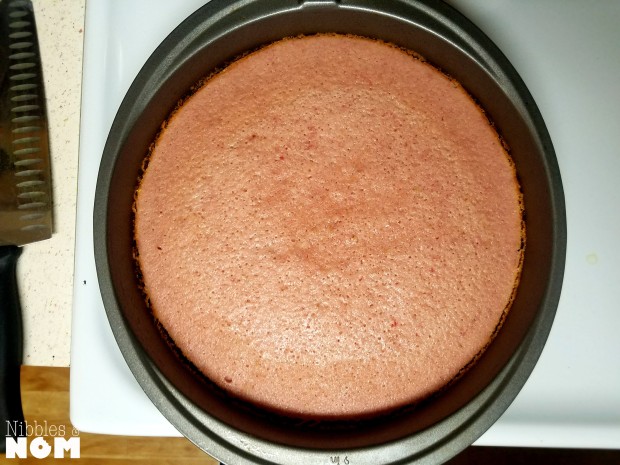
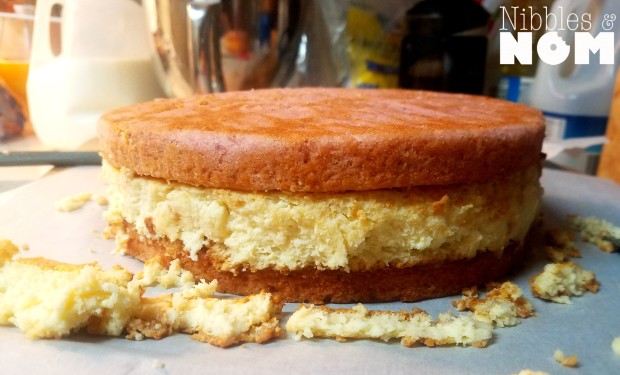
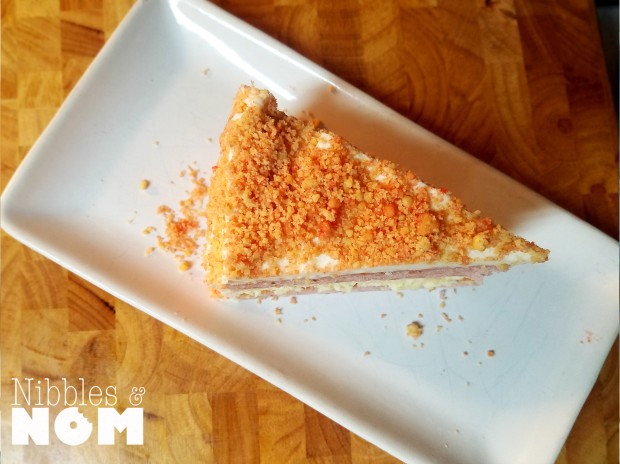
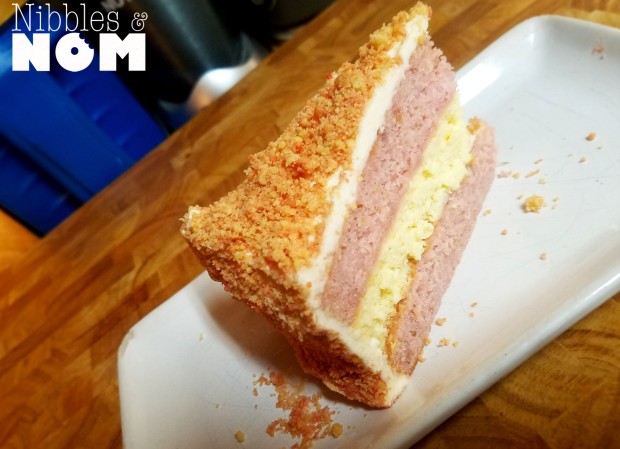
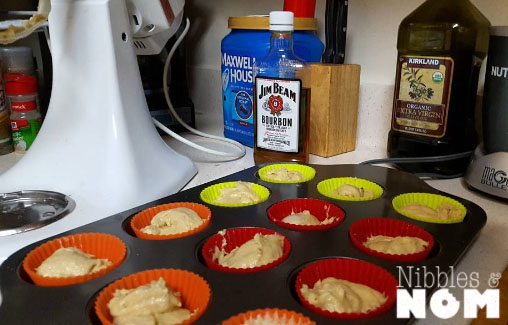
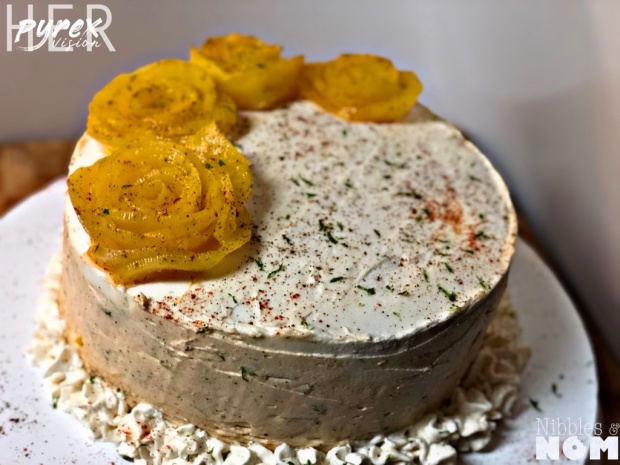
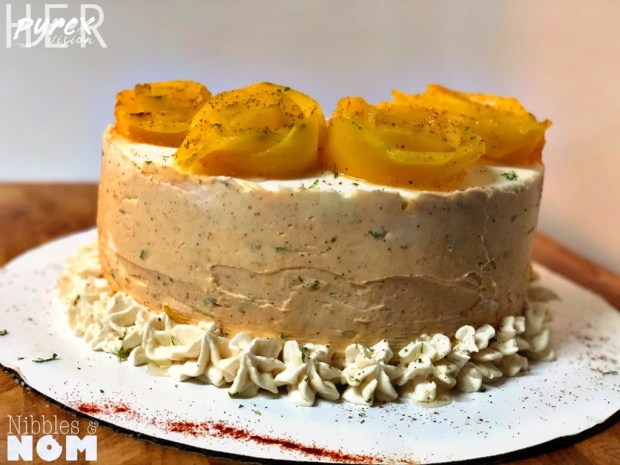
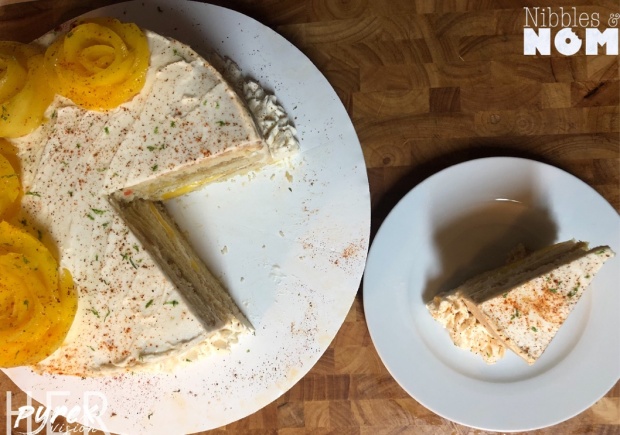
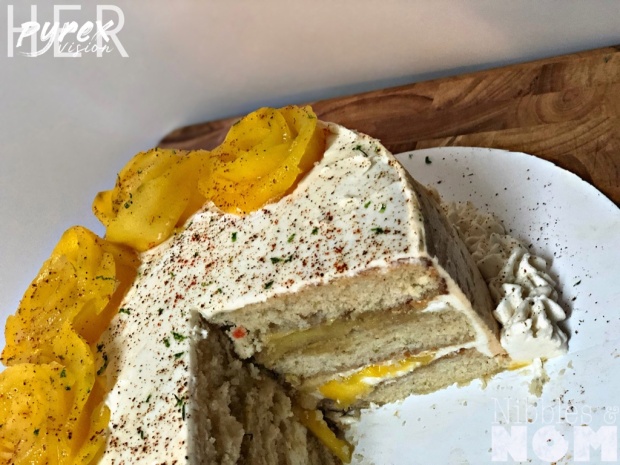
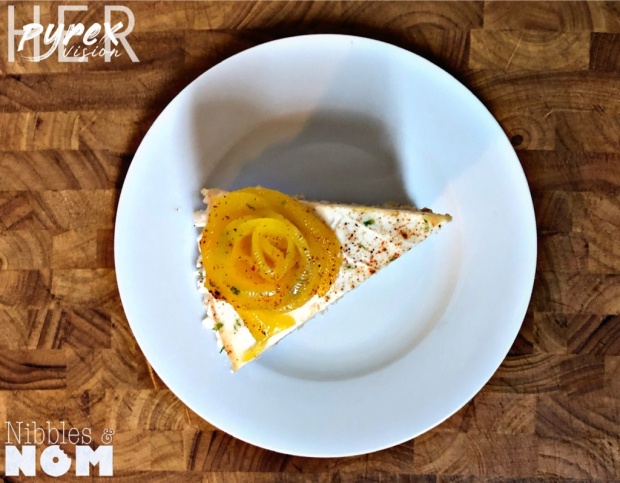
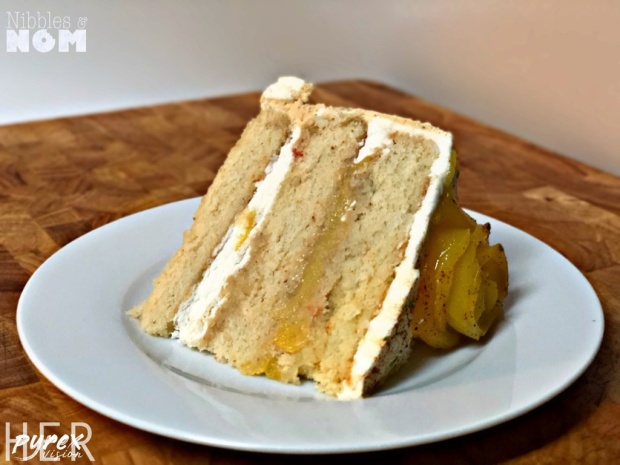
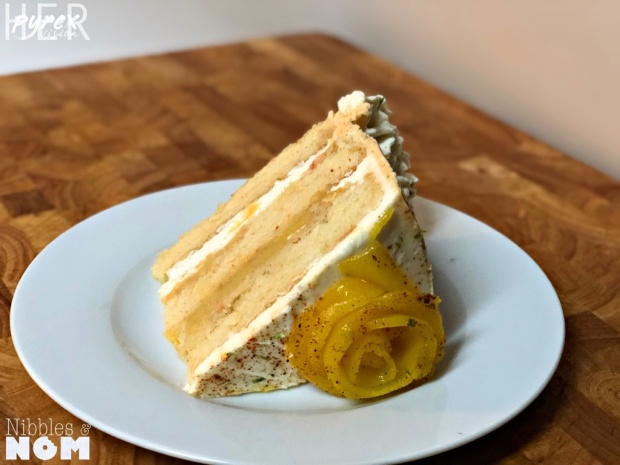
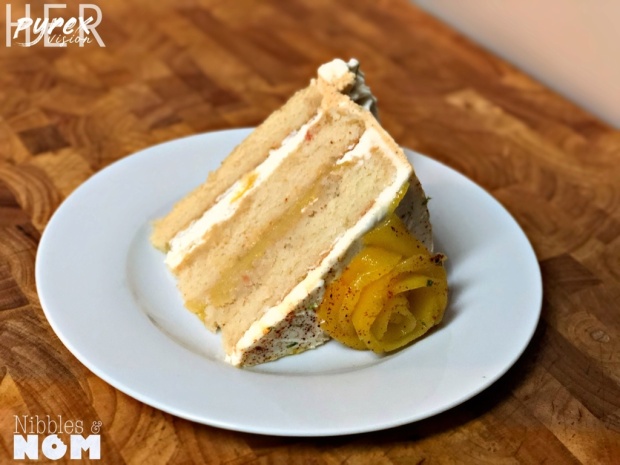
The sponge is a basic vanilla sponge infused with fresh mango puree, lime and lemon zest, fresh cayenne (no stems or seeds) and cayenne pepper (more control over the spice level).
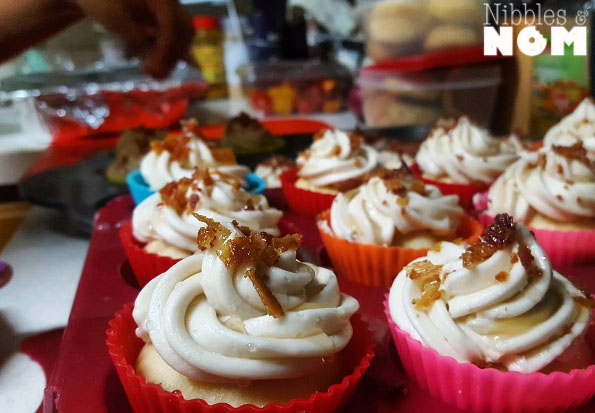
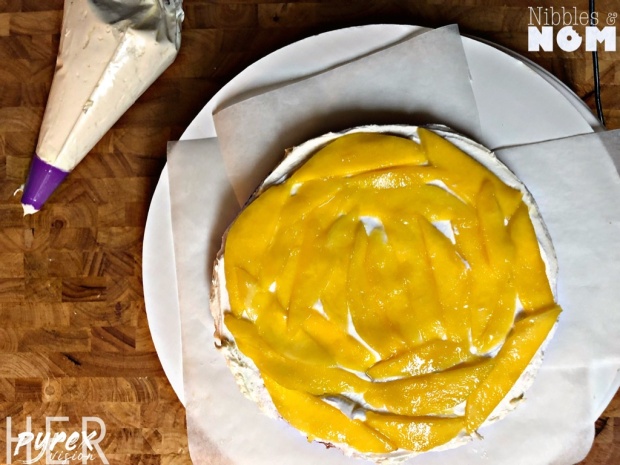
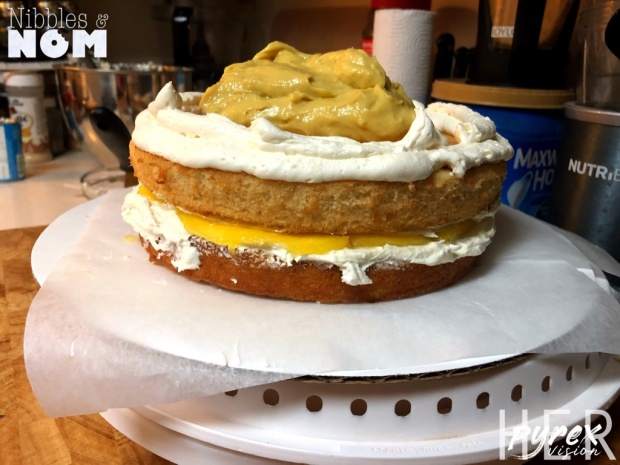
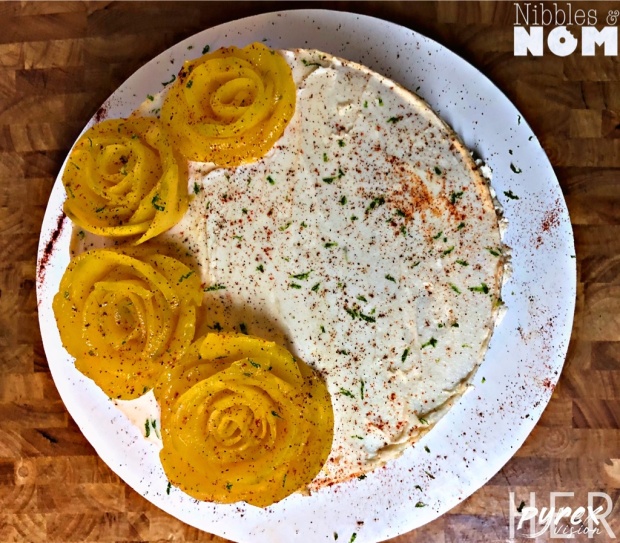
The first layer is buttercream and macerated fresh mango slices. The top layer is a lime-mango curd. It’s mostly sweet and creamy but there’s a tartness to it due to lime juice.
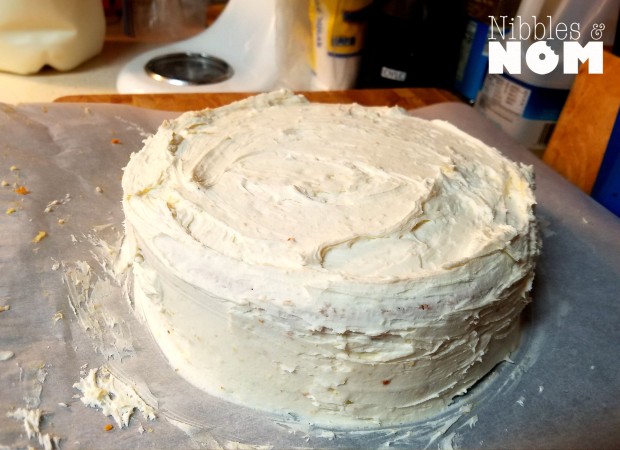
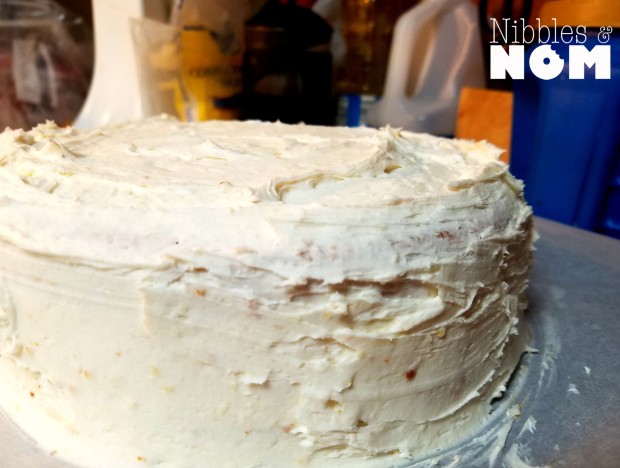
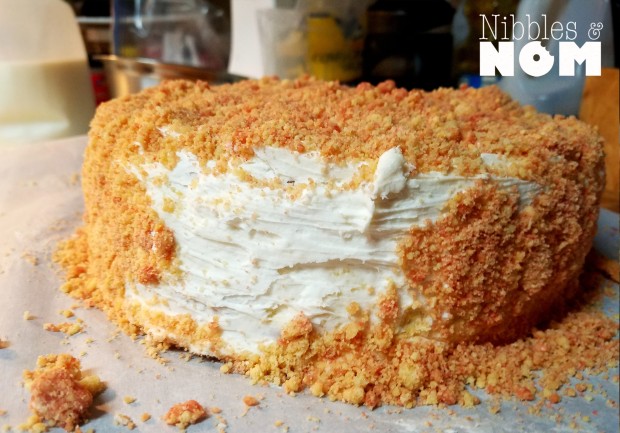
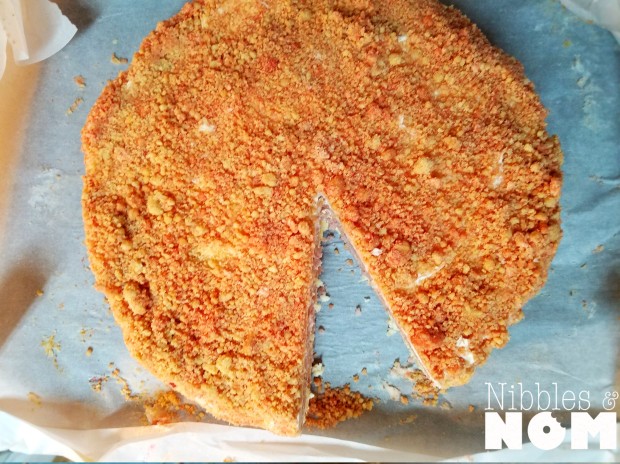
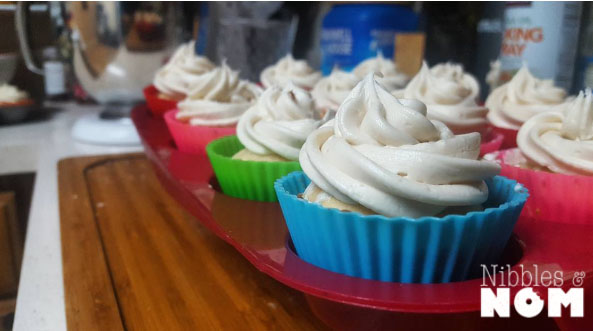
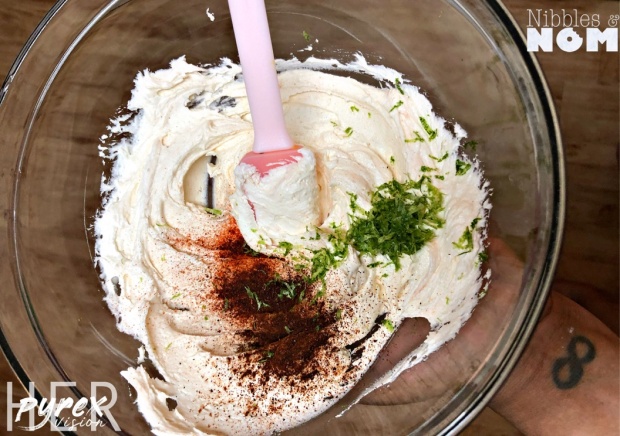
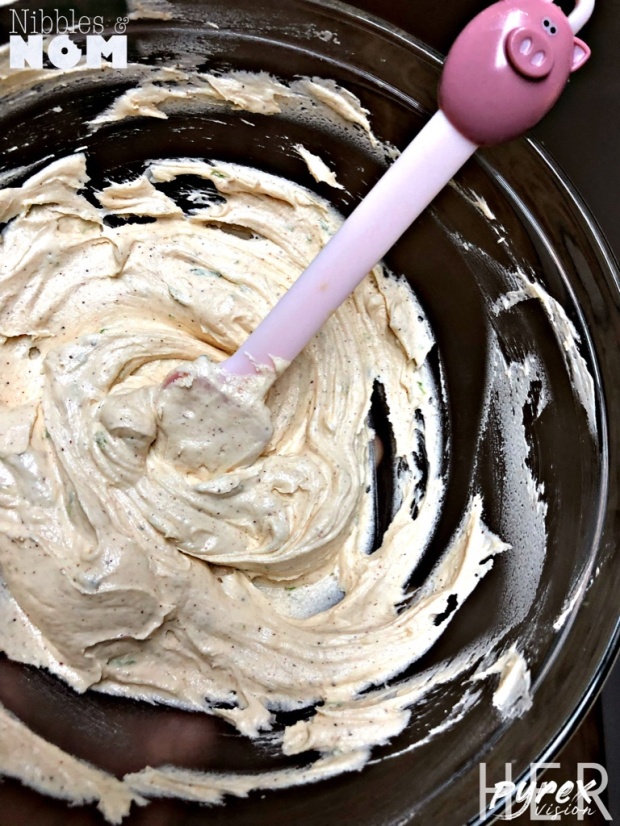
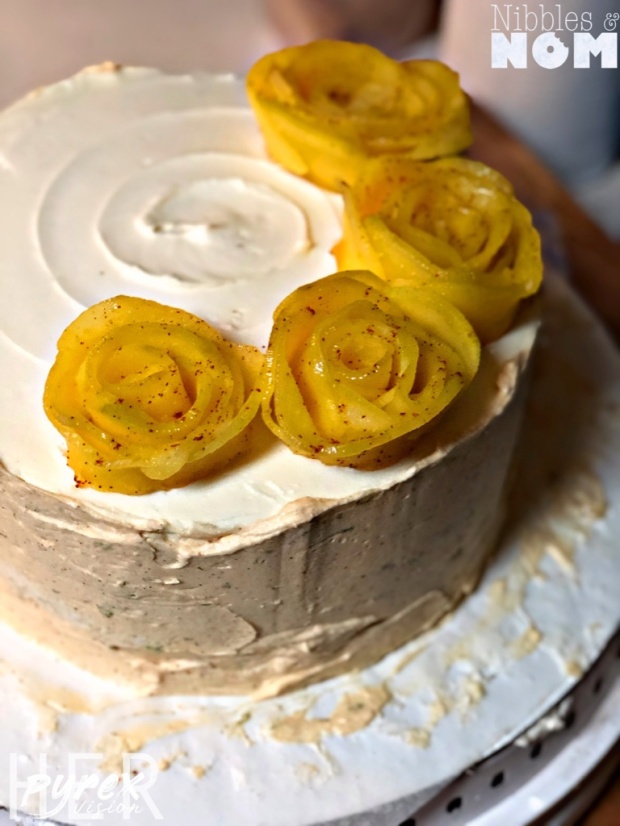
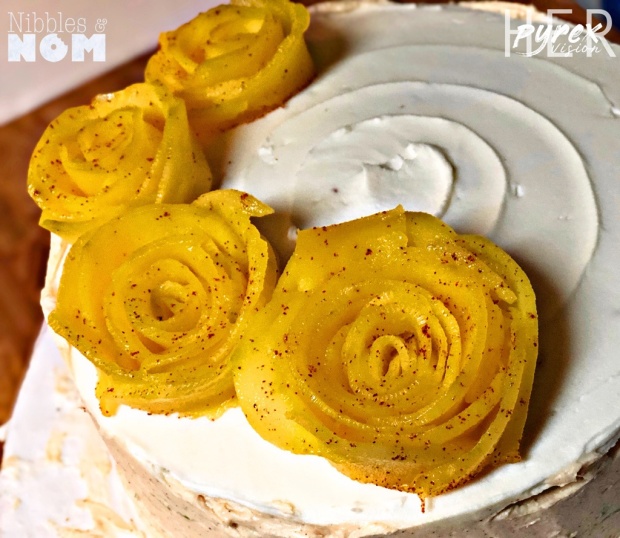
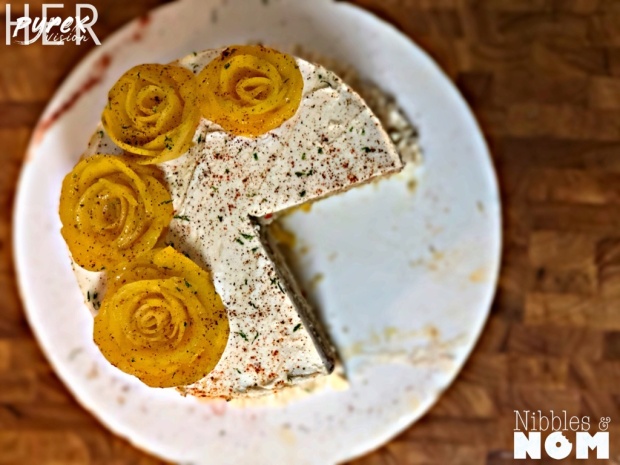
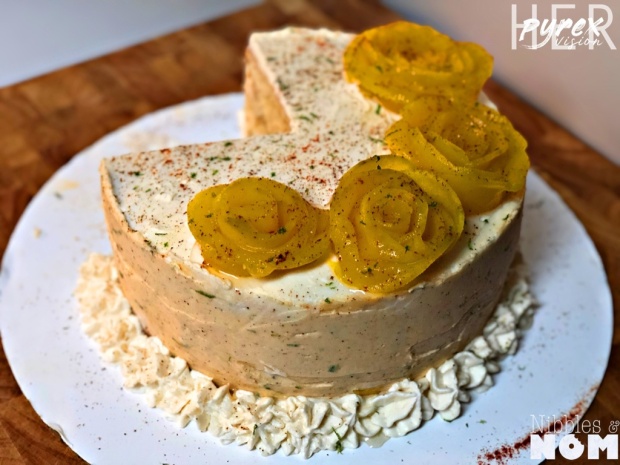
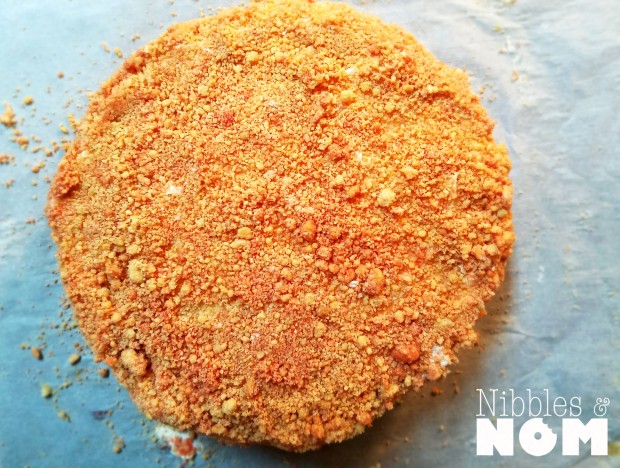
The outside buttercream is flavored with a little smoked paprika, chili powder and a little cayenne plus lime juice and zest.
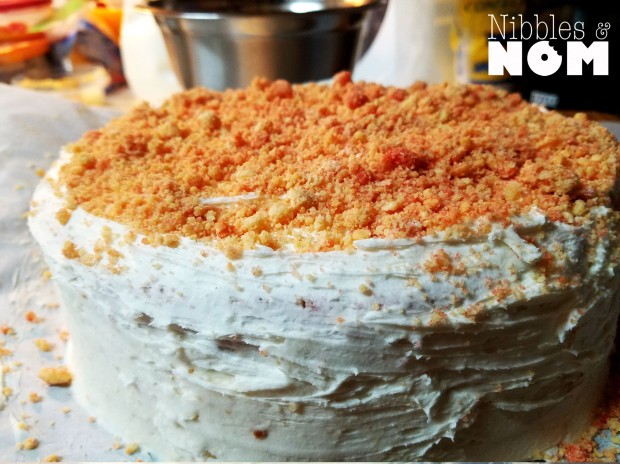
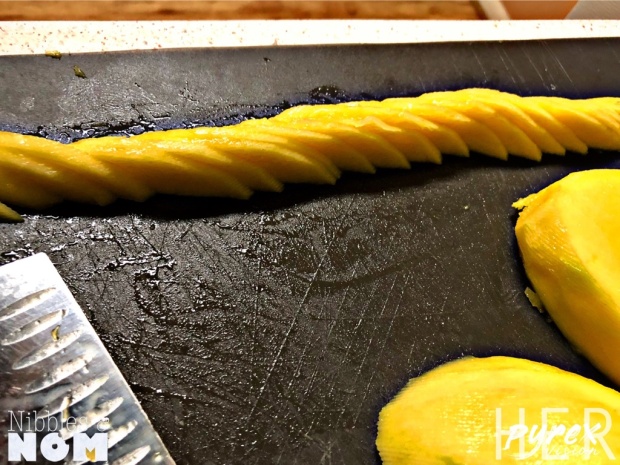
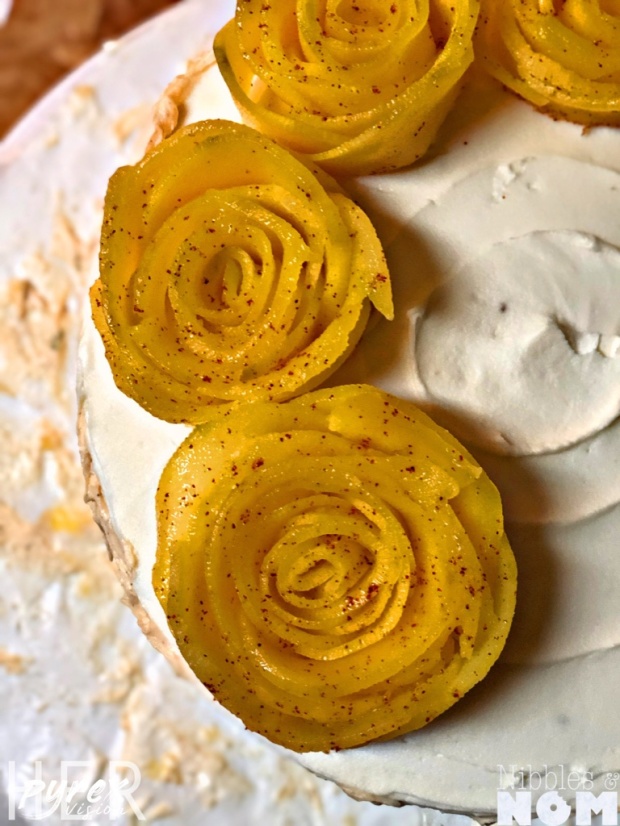
I taught myself to make mango roses, which serve as the decoration along with some whipped cream.
Ingredients:
Sponge:
2 ½ C flour
1 ½ C sugar
2 ½ tsp baking powder
½ tsp salt
1/2 c milk
1/2 c butter, room temperature
4 egg whites
1 tsp vanilla extract
¾ C mango puree
Spices (to taste): cayenne pepper, 2-5 cayenne peppers seeded and deveined, lemon zest, lime zest
1 large ripe mango
½ cup fresh lime juice
Squeeze of lemon juice
½- 1 tbsp of lime zest
½ tsp kosher salt
¾ cup sugar, divided (1/2:1/4)
3 large egg yolks
1 large egg
1 stick of butter, cubed or thinly sliced
Lime Simple Syrup:
3/4 cup of water
¼ cup of lime juice
1 cup of sugar
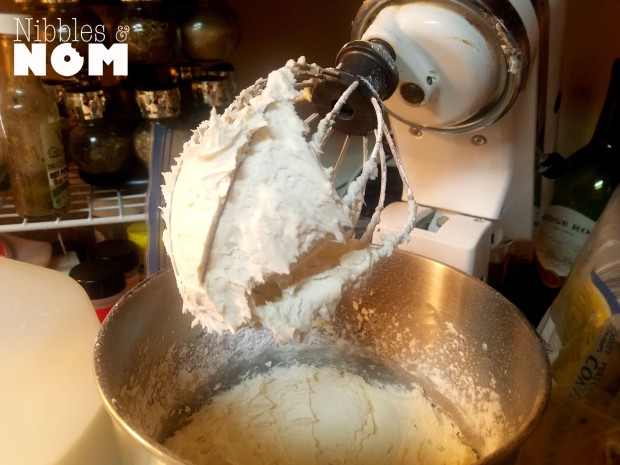
Vanilla Buttercream:
2 sticks softened butter
1 tsp vanilla extract
Roughly 5 cups of powdered sugar
Spiced Buttercream (optional/to taste):
Vanilla Buttercream
Smoked paprika
Chili powder
Cayenne pepper
Lime zest
Reserve:
2 mango cheeks, thinly sliced
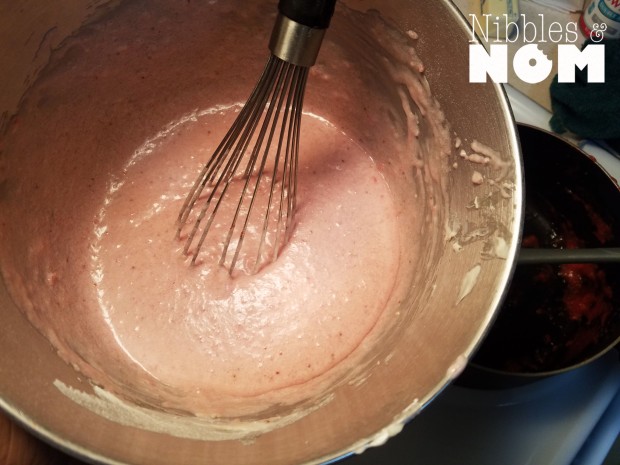
Curd:
- Slice fresh mango
- In a small bowl add sugar or simple syrup
- Toss to coat, let rest
- In a food processor, puree mango and transfer to a sauce pan
- Add lime zest and juice, salt and ½ c sugar
- Simmer while stirring until sugar dissolves
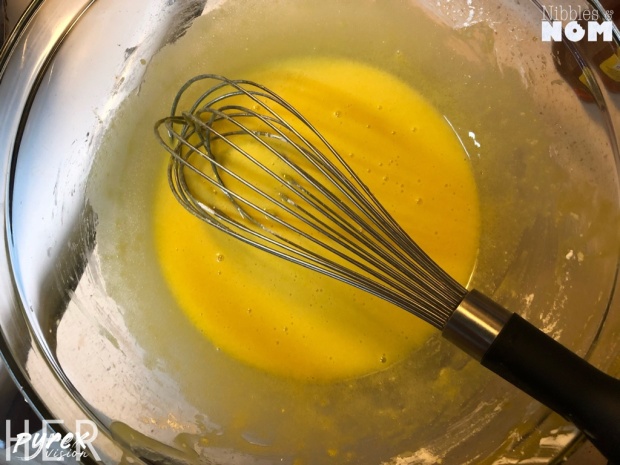
- Option 1: in a bowl, whisk eggs and remaining sugar until the yellow lightens
- Carefully and slowly stream in about half of the hot mango mixture into the eggs
- This is called tempering, do not rush this or you will cook the eggs
- This is called tempering, do not rush this or you will cook the eggs
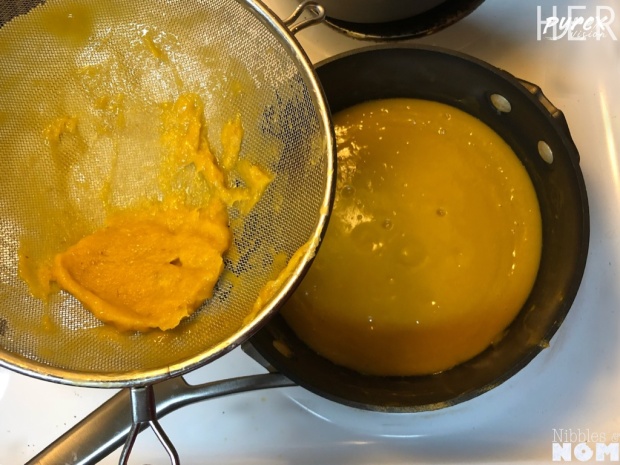
- Strain
- Pour the egg and mango mixture back into the sauce pan and whisk constantly until it thickens
- Do not let this boil
- Option 2: Combine ingredients and whisk constantly over a double boiler until it thickens

- Once thickened, remove from heat and add the butter a few pieces at a time and stir until fully incorporated before adding the next few
- Cover with plastic wrap, pressing directly onto the top of the curd so it doesn’t develop a weird skin
- Chill for 2-24 hours
Simple Syrup:
- In a sauce pan, combine the ingredients
- Simmer and stir until sugar is dissolved
- Refrigerate and store in a container
Sponge:
- Preheat oven to 350 degrees
- Grease and parchment 2 9”round cake pans or 3 8” round cake pans
- In the bowl of your mixer, combine the flour, sugar, baking powder, salt and gelatin using the paddle attachment
- Add the softened butter
- Add the vanilla
- Add the milk
- Add the egg whites, beat to combine
- Scrape down bowl
- Add mango puree
- Slowly incorporate the spices and the zest
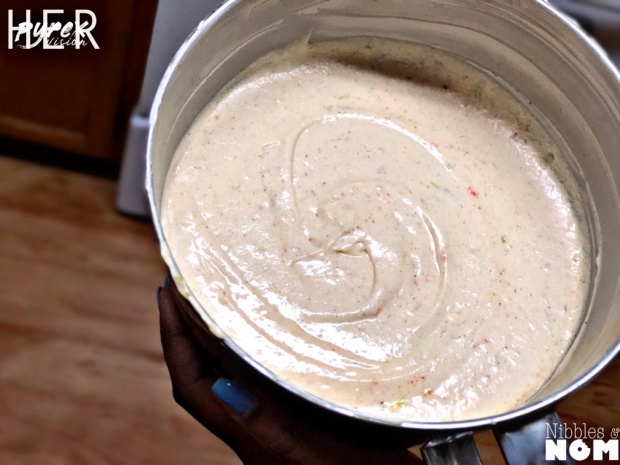
- I recommend starting with a teaspoon of zest and working up
- I recommend starting with a dash of cayenne
- Optional: seed and devein cayenne peppers and finely dice, start with a small amount and work your way up
- My proportions were zest > cayenne pepper>cayenne peppersDivide cake between cake pans
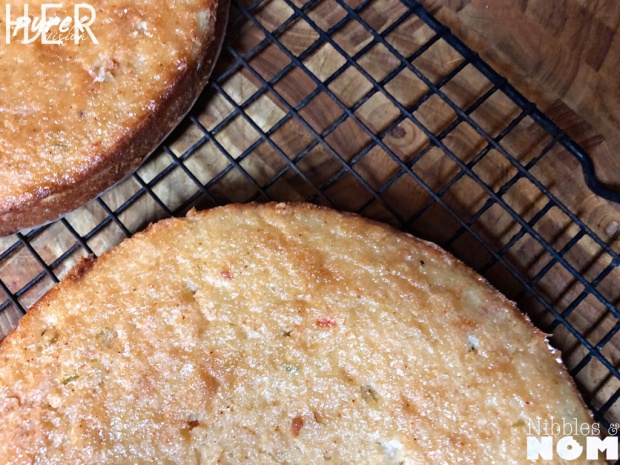
- Bake until they pass the toothpick test
- Allow to cool slightly before removing from the pans
- Carefully poke some holes into the cake (not all the way through)
- Carefully spoon some of the syrup over the sponges and allow to rest so they can fully sop up the goodness
Vanilla Buttercream:
- In the bowl of your stand mixer, whip the butter on medium until the butter looks white and fluffy
- Add vanilla
- On low speed, slowly and carefully add the powdered sugar about a cup at a time
- Slowly increase the speed and whip until well incorporated
- Repeat steps 3 and 4 until all of your sugar is used
Spiced Buttercream (Optional):
- Split ½-3/4 of the vanilla buttercream
- Starting with a small amount, slowly add the spices and TASTE adjusting for your preference
- My proportions were zest>chili powder> smoked paprika> cayenne
- This was a sweet and flavorful buttercream that left a curious and slightly spicy finish
Assembly:
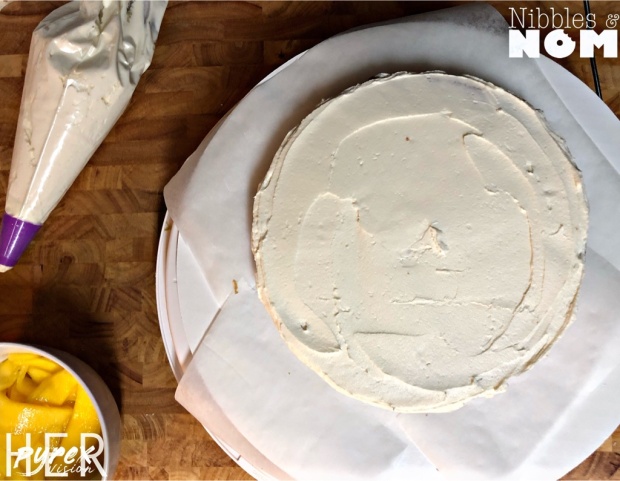
Bottom layer: Sponge
Next layer: Buttercream and the macerated mangoes (shake off excess liquid)
Next layer: Sponge
Next layer: Buttercream perimeter filled with curd
Next layer: Sponge

© 2019 by Alexa Mason. All Rights Reserved

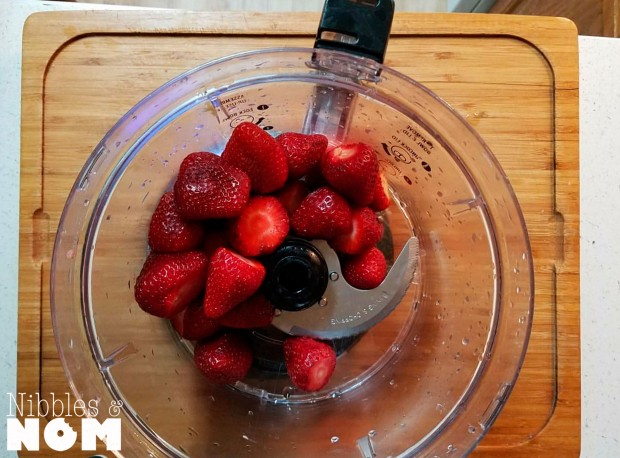
 Puree strawberries